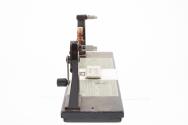
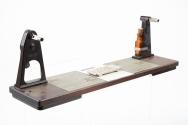
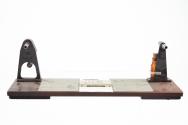
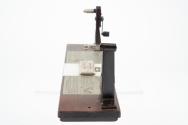
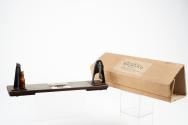
Kodascope Rewind Model 2


Equipment
Eastman Kodak Company
American, estab. 1892
Kodascope Rewind Model 2
November 1926
Metal and wood
Overall (rewind): 5 1/8 × 16 × 4 in., 4 lb. (13 × 40.6 × 10.2 cm, 1.8 kg)
Gift of Verner C. Kreuter, Jr., and Adam Kreuter II, 1965
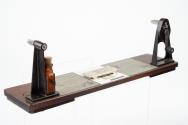
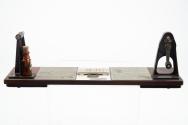
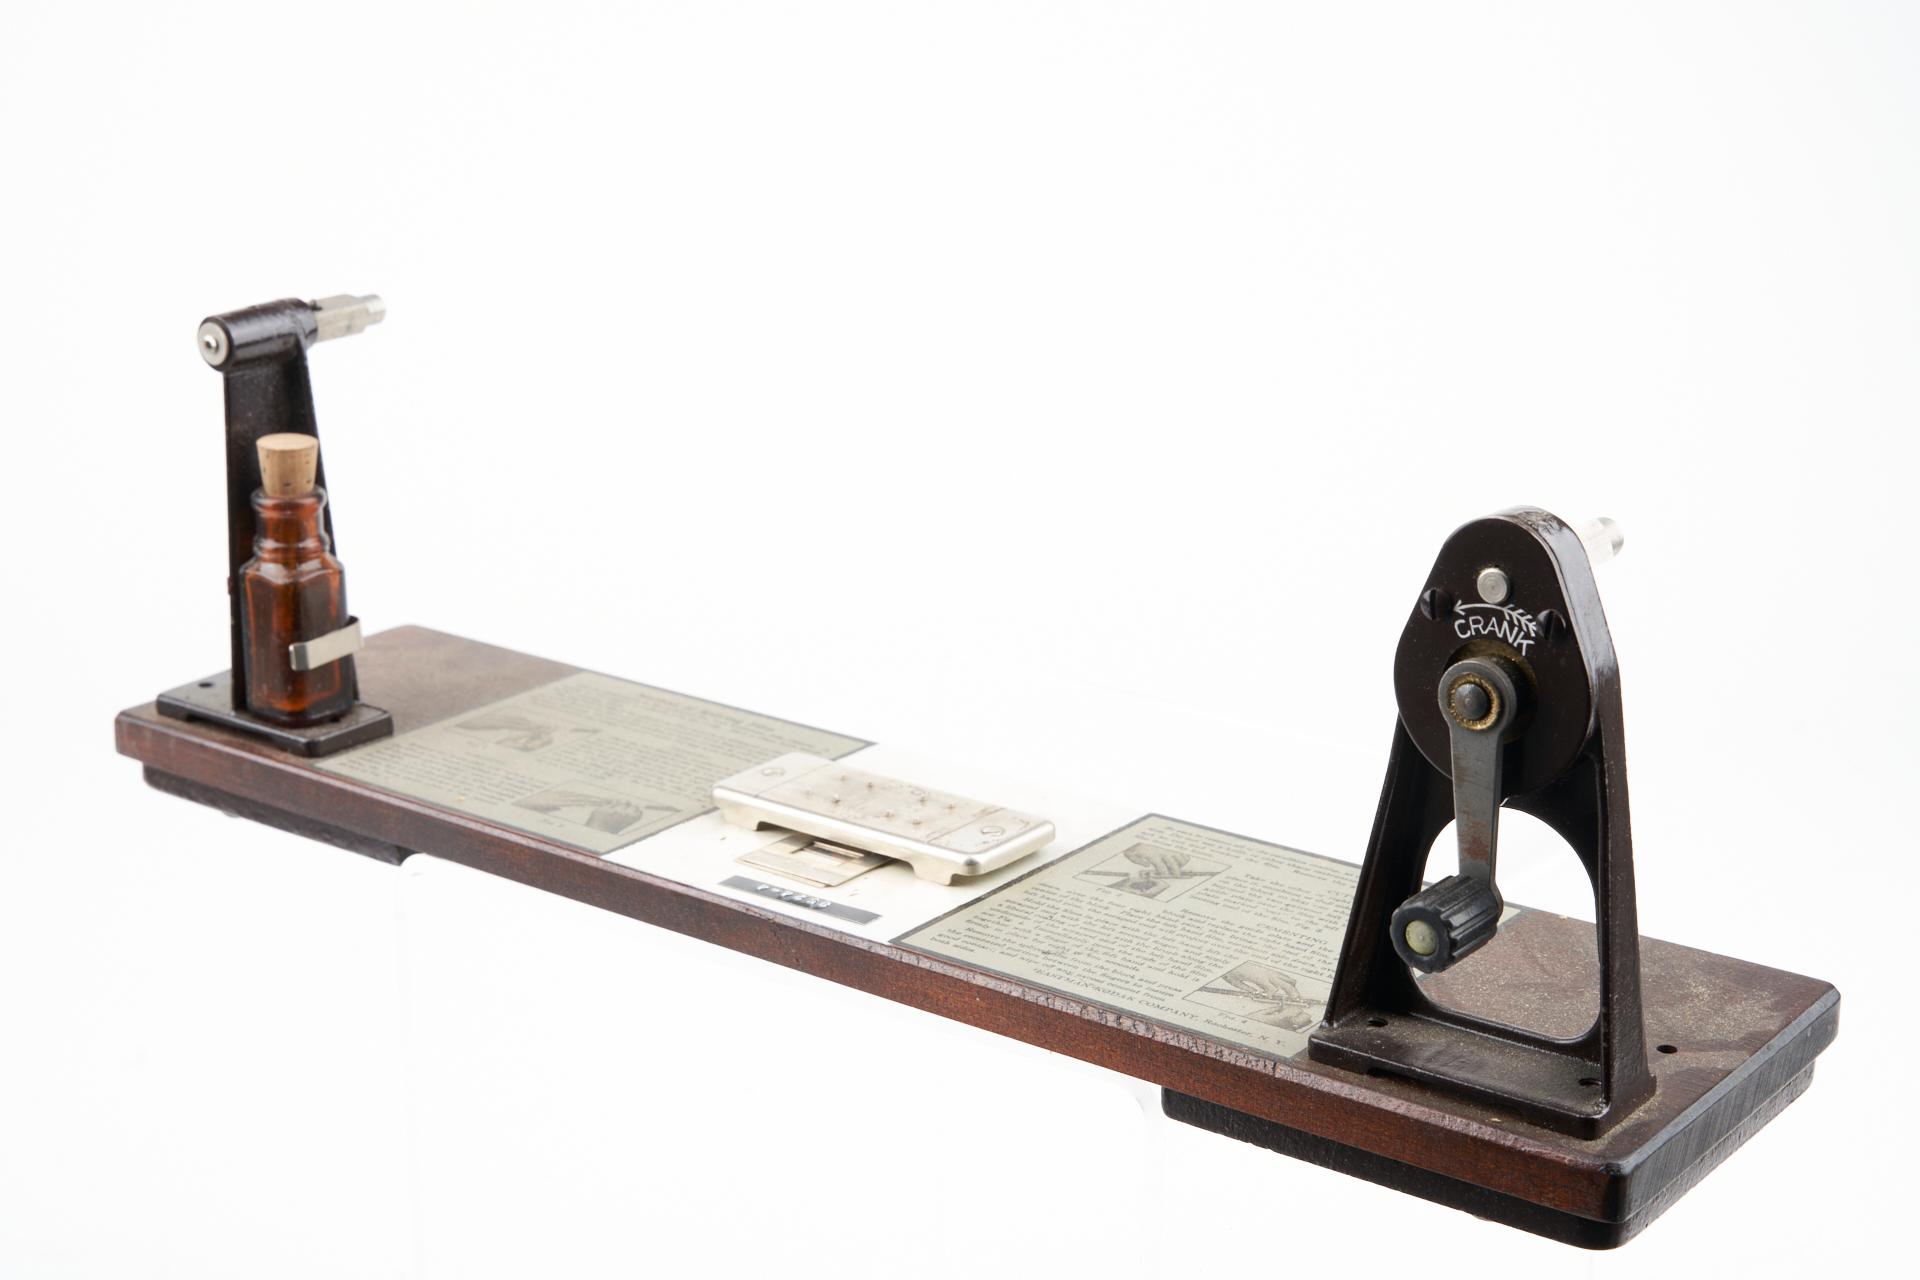
DescriptionPainted brown, rectangular rewind and splicer outfit with hand-cranked reel bracket, left reel bracket, a splicing block, splicing instructions, film cement bottle and two metal weights in original box.
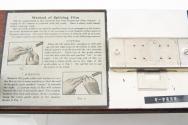
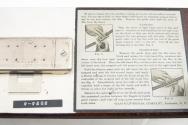
Inscriptions Engraved in silver on splicing block in center of rewind: U.S. PATENT 1.591.500, MADE IN U.S.A. BY EASTMAN KODAK CO. ROCHESTER, N.Y. / Engraved in silver on dry scrapers underneath the splicing block: CUT, SCRAPE, SCRAPE, CUT / Stamped in wood on top of rewind: MADE BY EASTMAN KODAK CO. ROCHE[illegible] / Embossed in white on black lablel on top of rewind: 8524-4 / Printed in black on silver label on top of rewind: Method of Splicing Film, Fill the small bottle to the indicated line with Kodascope Film Cement. A supply of the cement is included with the outfit. Have a sharp knife handy before starting work. The two reels of film to be spliced together must be so arranged on the brackets of the Rewind so that the top of the pictures in both lengths of film point in the same direction. Of course this applies to letters of titles as well as pictures. To make a splice, cut, scrape, cut and cement the film in the following manner: CUTTING, Place the left hand film, emulsion or dull side up, over the eight pins on the block, so that one whole picture extends beyond the two extreme right end pins. Place one of the guide plates over the film with the end marked "cut" to the right. Cut off the projecting end of film by drawng a sharp knife along the edge of the guide plate as in Fig. 1. Be careful not to use the point of the knife., Fig. 1, SCRAPING, Remove the guide plate and replace it over the film in the reverse position so that the end of the guide plate marked "scrape" is towards the right. A narrow strip of film will extend beyond the end of the guide plate. Thoroughly moisten this strip and scrape off the emulsion, using the extra guide plate in the manner shown in Fig. 2. Fig. 2 / Printed in black on silver label on top of rewind: Be sure to remove all of the emulsion coating, as cement will not adhere to emulsion. Do not use a knife or other sharp instrument for scraping, because this is apt to cut and weaken the film. Remove the guide plate and the strip of film from the block. CUTTING, Take the other or right hand piece of film and place it, emulsion or dull side down over the eight pins on the block so that one whole picture will extend beyond the two extreme left end pins. Place the guide plate over the film with the end of the guide plate marked "cut" to the left. Cut off the projecting end of the film, Fig. 3., Fig.3, CEMENTING, Remove the guide plate and the film from the block and replace the right hand film, emulsion side down, over the four right hand pins; this brings the end of the film in the center of the block. Place the left hand film, emulsion side down, over the four left hand pins; the scraped end will project over the end of the right hand film. Hold the films in place with the left hand, lift the scraped end with the left second finger, and apply a liberal coating of cement with the brush along the underside of the scraped end of the left hand film, see Fig. 4. Immediately press the ends of the film together with a finger of the left hand and hold it firmly in place for eight or ten seconds. Remove the spliced film from the block and press the cemented portion between the fingers to insure good contact, and wipe off any excess cement from both sides. Fig. 4, EASTMAN KODAK COMPANY, Rochester, N.Y. / Engraved in white on right reel bracket: CRANK / Inscribed in white on bottom of rewind: 78:191:109 / Written in black on white label on bottom of rewind: 78:191:109